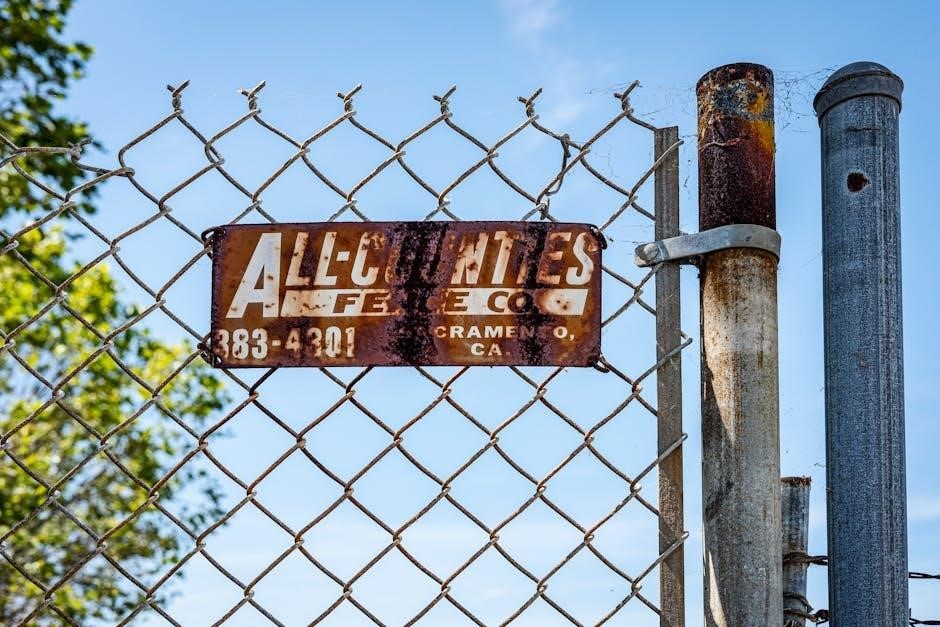
chain link fence installation guide pdf
Ready to DIY your chain link fence? Get our free, detailed installation guide in PDF format! Simple steps, clear diagrams & pro tips. Start building today!
Chain Link Fence Installation Guide
Comprehensive guides and manuals, often in PDF format, detail a step-by-step process for successful chain link fence and gate installations, covering all necessary aspects.
Planning & Preparation
Before commencing, meticulous planning is crucial. Numerous PDF guides emphasize verifying property lines to avoid disputes, ensuring the fence doesn’t encroach on neighboring land. It’s very important to confirm desired fence locations adhere to local regulations and permit requirements – these vary significantly by municipality.
Detailed PDFs outline necessary tools like post hole diggers, levels, and concrete mixers, alongside a comprehensive materials list including chain link fabric, posts, rails, and hardware. Careful consideration of underground utilities is paramount; locate them before digging to prevent damage and ensure safety. Thorough preparation, guided by these resources, sets the foundation for a successful installation.

Determining Property Lines & Regulations
PDF guides stress confirming property boundaries and adhering to local fence regulations, including height restrictions and setback requirements, before starting installation.
Property Line Verification
Detailed PDF instructions consistently emphasize the critical importance of accurately verifying property lines prior to any fence installation work. This prevents potential disputes with neighbors and avoids costly corrections later. Resources suggest consulting official property surveys, plats, or county records to establish precise boundaries.
Many guides recommend physically marking the proposed fence line, often using stakes and string, after confirming the property lines. It’s crucial to ensure the fence remains entirely within your property. Some PDFs highlight the necessity of obtaining a professional survey if existing boundary markers are unclear or missing. Ignoring this step can lead to legal issues and the need to relocate the entire fence structure, incurring significant expense and inconvenience.
Local Fence Regulations & Permits
Chain link fence installation PDF guides universally stress the necessity of researching and adhering to local regulations and permit requirements. These vary significantly by municipality and homeowner’s association (HOA). Regulations often dictate fence height, materials, setback distances from property lines, and aesthetic considerations.
Many downloadable instructions advise contacting your local building department or HOA before commencing any work to determine specific rules and obtain necessary permits. Failure to do so can result in fines, mandatory fence removal, or costly modifications to bring the installation into compliance. PDFs often include links to resources for finding local building codes and permit applications, ensuring a smooth and legally sound fence project.

Required Tools & Materials
PDF guides detail essential tools like post hole diggers and levels, alongside materials such as chain link fabric, posts, rails, and necessary hardware for assembly.
Tools List (Post Hole Digger, Level, etc.)
Detailed PDF installation guides consistently emphasize a specific toolkit for optimal results. A post hole digger – manual or powered – is crucial for creating appropriately sized and spaced holes for the fence posts. A spirit level ensures posts are perfectly vertical, vital for a stable and aesthetically pleasing fence. Angle supports aid in bracing posts during concrete setting. Tensioning wire and pliers are essential for stretching and securing the chain link fabric.
Furthermore, a hammer proves useful for various tasks, including driving stakes and adjusting components. Measuring tape is needed for accurate layout and spacing. Safety glasses and gloves are non-negotiable for personal protection. Some guides suggest a radisseur for specific tensioning needs, while carriage bolts and clips are fundamental for attaching fabric and rails.
Materials List (Chain Link Fabric, Posts, Rails, Hardware)
PDF guides universally detail a comprehensive materials list for a successful chain link fence project. This includes chain link fabric, available in varying heights and gauges, determining the fence’s overall security and appearance. Sturdy posts – typically steel or concrete – form the structural backbone, requiring appropriate depth and spacing. Rails, both top, middle, and bottom, provide horizontal support and fabric attachment points.
Essential hardware encompasses tension wire for fabric stretching, clips to secure the fabric to the rails, and carriage bolts for attaching rails and posts. Concrete mix is vital for setting posts securely. Don’t forget post caps for aesthetic finishing and protection. Guides often specify quantities based on fence length and post spacing, ensuring a complete and accurate materials inventory.
Site Preparation
PDF instructions emphasize careful site preparation, including marking the fence line and locating underground utilities before digging, ensuring a safe and compliant installation.
Marking Fence Line
Detailed PDF guides consistently stress the critical importance of accurately marking the intended fence line before commencing any digging. This initial step often involves using stakes and string to visually represent the fence’s path, ensuring it aligns with property boundaries and planned layouts. Several resources highlight the necessity of verifying property lines to avoid potential disputes with neighbors or legal issues.
The instructions frequently advise double-checking measurements and considering any easements or restrictions that might impact fence placement. Accurate marking prevents costly errors and ensures the fence is installed in the desired location. Some guides recommend using spray paint to clearly delineate the fence line, making it easily visible during the installation process. Proper marking is foundational for a professional and legally sound fence installation.
Underground Utility Location
Chain link fence installation PDFs universally emphasize the paramount importance of locating underground utilities before digging any post holes. This crucial step prevents potentially dangerous and expensive damage to gas lines, electrical cables, water pipes, and communication lines. Guides strongly recommend contacting your local “Call Before You Dig” service (like 811 in the US) to have utilities marked.
These services will dispatch professionals to identify and flag the location of underground lines on your property, free of charge. Ignoring this step can result in severe penalties, service disruptions, and personal injury. PDF instructions often include warnings about the legal and safety ramifications of failing to locate utilities. Always wait for the utility lines to be clearly marked before proceeding with any excavation work.

Installation Process
Chain link fence installation PDFs detail a sequential process, beginning with post installation and progressing through fabric attachment. These guides consistently highlight the need for accurate post spacing and secure concrete setting for stability. Rail attachment follows, typically utilizing brackets and hardware specified in the materials list.
The core of the process involves stretching the chain link fabric, often requiring tension wire and specialized clips. PDFs provide diagrams illustrating proper tensioning techniques to avoid sagging and ensure a taut, professional finish. Gate installation is addressed separately, covering post placement, frame assembly, and hardware mounting. Throughout, safety precautions are emphasized, and adherence to local regulations is stressed.

Post Installation
PDF guides emphasize digging appropriately sized holes, setting posts with concrete for stability, and ensuring correct spacing and alignment for a secure fence.
Post Hole Digging & Depth
Detailed PDF instructions consistently highlight the critical importance of proper post hole dimensions. Generally, holes should be three times the diameter of the post itself, ensuring ample concrete coverage for stability. Depth is equally crucial; a minimum depth of 24-36 inches is typically recommended, but local frost lines dictate necessary adjustments. Guides emphasize checking local building codes for specific depth requirements to prevent heaving during freeze-thaw cycles.
Accurate digging is paramount, with instructions often suggesting the use of post hole diggers or augers. PDFs frequently warn against shortcuts, stressing that insufficient depth or inadequate concrete can compromise the entire fence structure. Properly prepared holes are the foundation for a long-lasting and secure chain link fence installation.
Setting Posts with Concrete
PDF installation guides universally recommend using concrete to securely anchor chain link fence posts. The process typically involves carefully lowering the post into the excavated hole, ensuring it remains plumb (perfectly vertical) using a level. Instructions detail mixing concrete according to manufacturer’s specifications, often suggesting pre-mixed concrete for convenience.
Guides emphasize filling the hole with concrete, leaving a slight slope away from the post to facilitate water runoff. Proper tamping is crucial to eliminate air pockets and maximize concrete density. PDFs often include diagrams illustrating correct concrete pouring techniques and recommended curing times – typically 24-72 hours – before proceeding with further installation steps. Allowing adequate curing time is vital for long-term fence stability.
Post Spacing & Alignment
Chain link fence installation PDFs consistently stress the importance of consistent post spacing, typically ranging from 8 to 10 feet, depending on the height and gauge of the chain link fabric. Accurate alignment is paramount; guides often recommend using string lines stretched tightly between terminal posts to ensure a perfectly straight fence line.
PDFs detail methods for checking post alignment with a level, both vertically and horizontally. Maintaining consistent spacing prevents undue stress on the chain link fabric during tensioning. Instructions frequently advise against deviating from recommended spacing, as it can compromise the fence’s structural integrity. Precise alignment contributes to a professional-looking and durable fence installation.
Rail Installation
PDF guides illustrate attaching top, middle, and bottom rails to posts using brackets, tension bands, and hardware, ensuring a secure and level framework.
Attaching Top Rail
PDF installation manuals consistently emphasize the importance of securely attaching the top rail as the foundational element for overall fence stability. Typically, this involves utilizing rail ends and tension bands, carefully fitted around the terminal posts. These bands are then fastened with carriage bolts, ensuring a tight and lasting connection.
Guides detail how to slide the top rail through the terminal post’s opening, followed by securing it with the aforementioned hardware. Proper alignment is crucial; maintaining a level top rail is paramount for the subsequent installation of chain link fabric. Many resources highlight the use of a spirit level during this stage.
Furthermore, PDF documents often illustrate the correct spacing of tension bands along the rail, typically placed at regular intervals to distribute tension evenly. The goal is to create a rigid and straight top rail that will effectively support the chain link fabric and withstand external forces.
Attaching Middle & Bottom Rails
PDF guides consistently demonstrate that middle and bottom rails are attached using similar methods to the top rail, employing tension bands and carriage bolts for secure fastening to terminal and line posts. However, precise spacing between these rails is critical for fence integrity, often dictated by the height of the chain link fabric being used.
Installation manuals frequently illustrate the process of sliding rails through post openings, followed by tightening carriage bolts to create a robust connection. Maintaining consistent rail height across the entire fence line is emphasized, ensuring uniform tension distribution when the fabric is installed.
Resources often detail the use of rail end cups and tension wire to further enhance stability, particularly at the ends of the rails. Proper alignment and secure bolting are repeatedly stressed as vital steps for a long-lasting and structurally sound chain link fence.

Chain Link Fabric Installation
PDF instructions detail attaching fabric to posts with tension wire and clips, ensuring proper stretching and securement for lasting yard security and privacy.
Attaching Fabric to Posts
PDF guides emphasize carefully unrolling the chain link fabric along the fence line, preparing for attachment to the terminal posts first. The fabric’s selvedge, the finished edge, should consistently face the same direction – typically outward. Begin by loosely attaching the fabric using tie wires or hog rings at several points along each post.
These initial connections prevent significant sagging during the tensioning process. Ensure the fabric is vertically aligned before proceeding to more secure attachments. Many instructions highlight the importance of using the correct type of tension bands and brace bands, specifically designed for chain link applications. Proper placement of these bands is crucial for distributing tension evenly and preventing damage to the posts or fabric. Detailed diagrams within the PDFs illustrate optimal band positioning for various post sizes and fabric heights.
Tensioning the Fabric
PDF installation manuals consistently detail the use of tension wire, running it through the fabric’s diamond openings and securing it to the end posts with tension bands. The wire is then tightened using a specialized tensioning tool, gradually applying force to stretch the fabric. Guides stress the importance of even tensioning, working along the entire length of the fence to avoid localized stress points.
They often recommend applying tension in stages, checking for proper alignment and verticality as you go. Over-tensioning can damage the fabric or posts, so careful monitoring is essential. Diagrams within the PDFs illustrate proper tension wire routing and clip placement, typically spaced no more than 24 inches apart, ensuring secure and uniform fabric support.
Using Tension Wire & Clips
PDF guides emphasize wrapping tension wire around the bottom rail end band carriage bolt and securing it with multiple twists using pliers, ensuring a firm grip. The tension wire should consistently run along the same side of the posts as the chain-link fabric itself. Installation manuals detail applying tension wire clips at intervals, typically no more than 24 inches apart, or as needed to maintain secure fabric attachment.
These clips are crucial for preventing the fabric from sagging or loosening over time. Diagrams within the PDFs clearly illustrate the correct clip orientation and placement. Proper clip installation, combined with consistent tension wire application, guarantees a durable and aesthetically pleasing fence.

Gate Installation
PDF instructions cover gate post installation, frame setup, and hardware attachment – including hinges and latches – for a functional and secure access point.
Gate Post Installation
Detailed PDF guides emphasize the critical importance of robust gate post installation for long-term stability and smooth operation. These instructions typically begin with digging post holes specifically sized for the gate post diameter and intended gate weight, often deeper and wider than standard fence posts.
Proper concrete footing preparation is paramount, ensuring the posts are set plumb and securely anchored. Many guides illustrate using bracing to maintain alignment while the concrete cures. The PDF documents frequently highlight the necessity of using larger diameter posts for gates, particularly wider gates, to prevent sagging or bending under stress.
Furthermore, they often specify the correct type of concrete mix and reinforcement techniques, like rebar, to maximize strength. Accurate measurements and careful leveling are consistently stressed throughout these installation manuals.
Gate Frame Installation
PDF installation guides meticulously detail the process of attaching the gate frame to the previously installed gate posts. These documents commonly illustrate aligning the gate frame squarely within the post openings, ensuring consistent gaps for smooth operation.
The instructions emphasize using appropriate hardware – typically carriage bolts and nuts – to securely fasten the frame to the posts, often with specific torque recommendations. Guides frequently depict the use of hinges at this stage, detailing proper placement for optimal swing direction and weight distribution.
Many manuals highlight the importance of checking gate frame levelness and plumbness before fully tightening the hardware, allowing for adjustments as needed. They also often include diagrams illustrating proper hinge alignment and gap settings for latch functionality, ensuring a secure closure.
Gate Hardware Installation (Hinges, Latches)
Chain link fence installation PDFs provide detailed instructions for attaching gate hardware, beginning with hinge placement. Guides illustrate proper hinge alignment, ensuring smooth gate swing and preventing binding. They specify using appropriate bolts and nuts, often with torque guidelines for secure fastening.
Latch installation is also thoroughly covered, detailing the alignment of the latch bolt with the receiver on the gate frame. Many manuals emphasize adjusting the latch for a snug, yet easy, closure.
PDFs frequently include diagrams showing the correct positioning of tension straps and bands to support the gate frame and prevent sagging. They also often address the installation of gate closers and other accessories, providing clear steps for optimal functionality and security.
Finishing Touches
Chain link fence installation PDFs emphasize the importance of completing finishing touches for both aesthetics and longevity. These guides detail installing post caps, protecting posts from weather damage and providing a cleaner look. Accessory installation, like privacy slats or rail end cups, is also covered with step-by-step instructions.
Many PDFs highlight the need for a final inspection, checking all connections – posts, rails, fabric, and hardware – for tightness and security. Adjustments to tension wires and gate latches are often included in this stage.
Guides frequently recommend cleaning the fence to remove any debris or residue from installation, ensuring a professional and polished appearance. Proper finishing enhances the fence’s overall durability and visual appeal.
Post Caps & Accessories
Chain link fence installation PDFs dedicate sections to post caps and optional accessories, enhancing both the fence’s appearance and protective qualities. These guides detail various cap styles – such as decorative finials or simple flat caps – and their installation methods, often using set screws or adhesive;
PDFs frequently showcase accessories like privacy slats, woven into the chain link fabric for increased seclusion, and rail end cups, providing a finished look to exposed rail ends. Tension bands and brace bands are also covered, detailing their role in reinforcing the fence structure;
Installation instructions for each accessory are typically included, ensuring proper fit and secure attachment, contributing to the fence’s overall stability and aesthetic appeal.
Final Inspection & Adjustments
Chain link fence installation PDFs emphasize a thorough final inspection to guarantee a secure and aesthetically pleasing result. This involves checking post alignment with a spirit level, verifying the tension of the fabric, and ensuring all hardware – including tension bands, brace bands, and gate hinges – is tightly secured.
PDF guides often detail adjustments needed for gate operation, such as hinge alignment to prevent sagging or binding, and latch adjustments for smooth closure. They also recommend inspecting tension wire clips, ensuring they are evenly spaced and firmly gripping the fabric.
Addressing any minor imperfections at this stage ensures long-term fence integrity and prevents future maintenance issues, as highlighted in comprehensive installation manuals.
Safety Considerations
Chain link fence installation guide PDFs consistently prioritize safety throughout the process. They strongly advise wearing appropriate personal protective equipment (PPE), including safety glasses, work gloves, and sturdy footwear, to prevent injuries from tools and materials.
PDFs emphasize the critical importance of locating underground utilities before digging, to avoid damaging essential services and potentially causing hazardous situations. They also caution against working near overhead power lines.
Proper lifting techniques are detailed to prevent back strain when handling heavy posts and materials. Furthermore, guides warn about the safe use of power tools and concrete mixing, stressing the need to follow manufacturer’s instructions carefully.