
drywall installation guide pdf
Get your FREE drywall installation guide PDF! Comprehensive step-by-step tutorial with expert tips for a smooth finish.
Drywall, also known as sheetrock or plasterboard, is a versatile and essential material for modern construction. It provides smooth, durable surfaces for walls and ceilings, offering fire resistance, soundproofing, and ease of installation. This guide outlines the process, tools, and best practices for successful drywall installation, ensuring professional results for both beginners and experienced contractors.
Overview of Drywall and Its Importance
Drywall, also known as sheetrock or plasterboard, is a widely used construction material consisting of gypsum sandwiched between two layers of paper. It provides smooth, durable surfaces for walls and ceilings, offering fire resistance, soundproofing, and ease of installation. Drywall is essential for creating modern, functional spaces due to its cost-effectiveness, lightweight nature, and versatility in finishing. Its ability to be painted, textured, or finished with trim makes it a cornerstone in both residential and commercial projects, ensuring a clean, professional appearance and enhancing safety and comfort in buildings.
Benefits of Using Drywall in Construction
Drywall offers numerous advantages in construction, making it a preferred choice for builders and homeowners. Its lightweight design simplifies transportation and installation, reducing labor costs. Drywall provides excellent fire resistance, meeting safety standards in residential and commercial spaces. It also acts as a sound barrier, minimizing noise transmission between rooms. Additionally, drywall is cost-effective compared to traditional plastering methods and allows for quick project completion. Its smooth surface is ideal for painting and finishing, enhancing aesthetic appeal. Overall, drywall’s durability, versatility, and ease of use make it an indispensable material in modern construction projects.

Tools and Materials Needed for Drywall Installation
Drywall installation requires specific tools and materials for a successful project. Essential tools include a drywall lift for handling large panels, a utility knife or drywall saw for precise cutting, and bugle head screws for securing panels to studs. Materials needed are drywall panels of varying sizes, joint tape for sealing seams, and joint compound for finishing. Additional items like a T-square for straight cuts, a drill for efficient screwing, and sandpaper for smoothing surfaces are also necessary. Using the right tools and materials ensures a professional finish and structural integrity, making the installation process efficient and effective.
Essential Tools: Drywall Lift, Saw, and Screws

A drywall lift is crucial for handling large panels, especially on ceilings, reducing strain and ensuring precise placement. A drywall saw or utility knife is necessary for cutting panels accurately to fit spaces or openings. Bugle head screws are preferred for securing drywall to studs, with 1 1/4″ screws for walls and 1 5/8″ for ceilings to prevent popping. Using the right tools ensures efficient and professional results, minimizing errors and enhancing the overall quality of the installation. Proper tool selection and usage are vital for a successful drywall project, making these essentials indispensable for any installer.
Materials: Drywall Panels, Joint Tape, and Compound
Drywall panels come in various sizes, with standard sheets measuring 4×8 feet and thicknesses ranging from 1/4 to 5/8 inches. Joint tape, typically 2 inches wide, is used to reinforce seams between panels. A joint compound, also known as spackling compound, is applied to cover tape and screws, creating a smooth surface. These materials are essential for ensuring durability and a seamless finish. Properly selecting and using these components is critical for achieving professional-looking results in any drywall installation project, as they directly impact the strength and appearance of the walls and ceilings.

Preparing the Framing for Drywall
Ensure studs are straight, secure, and properly spaced. Use kiln-dried lumber to prevent warping and check for water damage. Install ceiling drywall first for stability.
Ensuring Studs Are Straight and Secure
Before installing drywall, verify that studs are straight, plumb, and securely anchored to the floor and ceiling headers. Use a carpenter’s square or laser level to check alignment. Inspect for water damage or warping, as kiln-dried lumber is essential to prevent future issues. Ensure studs are spaced correctly, typically 16 inches on-center, and free from twists. If necessary, shim uneven studs to maintain a level surface. This step is critical for proper drywall alignment and a smooth finish, preventing future cracks or uneven surfaces.
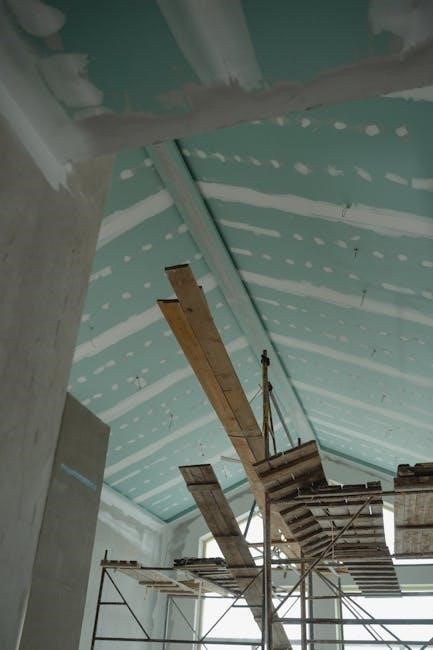
Installing Ceiling Drywall First
Always begin drywall installation with the ceiling to prevent damage from wall panels. Use a drywall lift to hold ceiling panels securely, ensuring even placement. Start by attaching panels to the center, working outward to avoid sagging. Screw panels to ceiling joists using 1 5/8″ screws, spaced 12-16 inches apart. Ensure the surface is level and smooth before proceeding to walls. This method guarantees a professional finish and minimizes the risk of damage during subsequent wall installations.
Cutting Drywall for Installation
Cutting drywall involves scoring the face paper with a utility knife and snapping the board along the line. Use a straightedge for straight cuts and a saw for irregular shapes. Always measure carefully to ensure accurate fits.
Scoring and Snapping Drywall Sheets
Scoring and snapping drywall sheets is a fundamental step in achieving precise cuts. Begin by marking the desired cut line with a pencil. Using a utility knife or drywall saw, score the face paper deeply but avoid cutting through the gypsum core. Once scored, firmly grasp both sides of the drywall and snap it along the scored line. For a clean edge, ensure the cut is made on a flat, stable surface. This method ensures minimal dust and waste, providing a professional finish for your installation project.
Cutting Out Openings for Doors and Windows
Accurately measuring and marking openings for doors and windows is crucial for a precise fit. Use a drywall saw or utility knife to carefully cut along the marked lines. Start by scoring the face paper deeply, then snap the drywall along the scored edge. For smoother results, use a rasp to finish the edges. This method ensures clean, professional-looking openings that align perfectly with your project’s requirements.

Installing Drywall on Walls and Ceilings
Start with the ceiling, using a drywall lift to position panels securely. Ensure walls are installed next, aligning edges precisely and fastening with screws for a seamless finish.
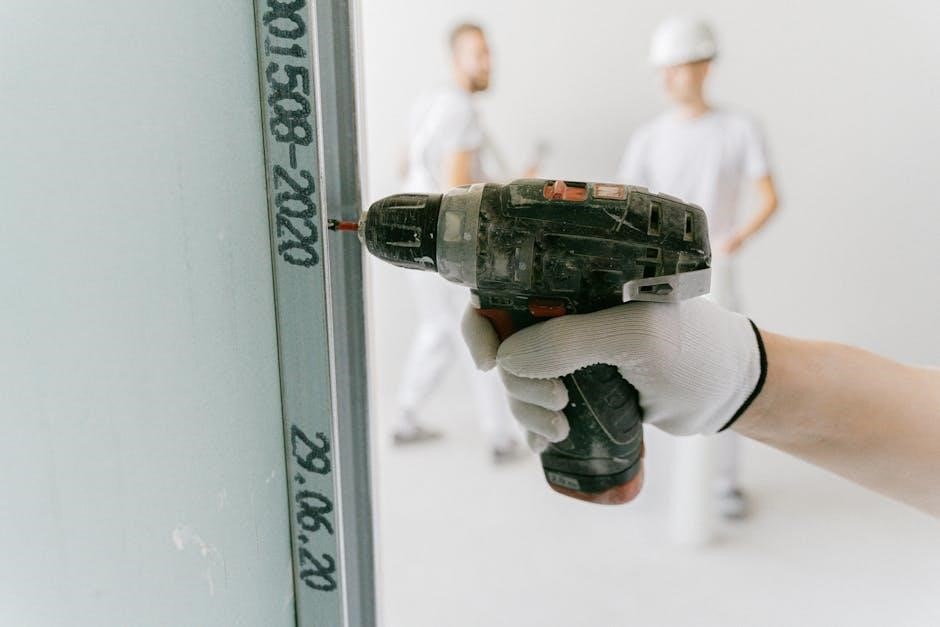
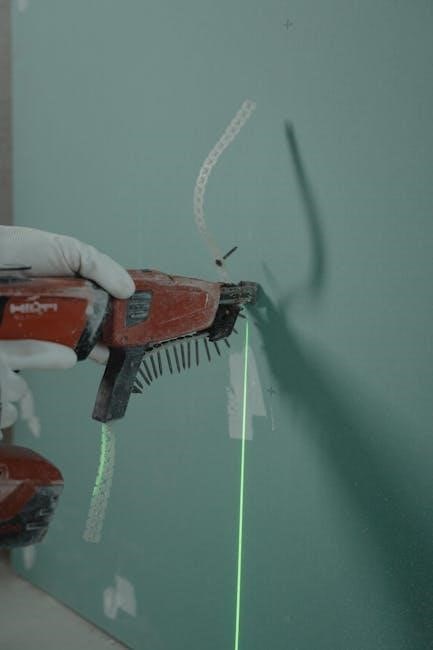
Securing Drywall with Screws: Best Practices
Use bugle head drywall screws for walls and 1 5/8″ screws for ceilings. Space screws 12-16 inches apart, ensuring they’re driven into studs. Avoid over-tightening, as this can cause damage. Start from the center and work outward to prevent buckling. For ceilings, use a screw guide or marks to maintain consistency. Always pre-drill for outlets and edges to avoid splitting. This ensures a secure, long-lasting installation, preventing future issues like popped screws or sagging panels.
Aligning Drywall Sheets for Seamless Joints
To achieve seamless joints, align drywall sheets carefully, ensuring edges meet squarely. Use a laser level to guide placement, starting from the center and working outward. Fit sheets tightly against adjacent panels, avoiding gaps. Stagger joints between rows to prevent visual lines. Secure sheets with screws spaced evenly, ensuring edges align with studs. Use a T-square to verify alignment and a utility knife to trim excess material. Proper alignment prevents visible seams and ensures a smooth finish, making joint taping more effective. This step is crucial for achieving professional-looking results.

Finishing Drywall Joints and Surfaces
Apply joint tape and compound to seams, feathering edges for smooth blending. Sand surfaces thoroughly, ensuring no imperfections remain. This step prepares the drywall for painting or finishing.
Applying Joint Tape and Compound
Apply joint tape over all drywall seams, pressing firmly to ensure it adheres properly. Use a putty knife to spread a thin layer of compound over the tape, feathering the edges outward. Allow the compound to dry completely before applying additional coats. Sand lightly between layers to create a smooth surface. Ensure the compound is spread evenly, avoiding excess buildup. Proper application ensures strong, invisible joints. This step is crucial for achieving a flawless finish and preventing cracks or separations in the future.
Sanding and Preparing the Surface for Painting
Use a sanding block or sponge to smooth out the drywall surface, focusing on compound-covered areas. Sand in a circular motion, feathering edges for a seamless finish. Wipe away dust with a damp cloth or vacuum. Ensure all joints are flush and free of imperfections. After sanding, inspect for any remaining defects and reapply compound if necessary. A well-sanded surface ensures proper paint adhesion and a professional appearance. This final step is essential before painting or finishing, guaranteeing a smooth and even result.
Safety and Best Practices
Always wear protective gear, including gloves, safety goggles, and a dust mask. Ensure proper ventilation and avoid overexertion. Store materials securely to prevent accidents and ensure a safe working environment at all times.
Handling Drywall Safely
Wear protective gear, including gloves, safety goggles, and a dust mask, to minimize risks. Lift panels carefully, bending at the knees to avoid back strain. Always work with a partner when handling large sheets. Use a drywall lift for ceiling installations to reduce physical effort. Ensure panels are securely fastened to prevent shifting or falling. Store drywall flat and off the floor to maintain stability. Keep the work area clean and well-ventilated, and avoid exposure to moisture. Use utility knives with caution, and dispose of scrap properly. Follow manufacturer guidelines for handling and storage to ensure a safe working environment.
Professional Tips for a Flawless Installation
Measure spaces accurately and mark panels before cutting to ensure precise fits. Use a T-square to guide your utility knife for straight cuts. Align sheets carefully to minimize seams and avoid mismatched edges. Secure panels firmly to studs, spacing screws evenly to prevent buckling. Plan your layout to minimize cutting and waste. Apply joint compound smoothly and feather edges for seamless joints. Allow compound to dry fully between coats, sanding lightly before painting. Regularly inspect edges and corners to ensure they are flush and secure. Proper planning and attention to detail will result in a professional, long-lasting drywall finish.