checklist cessna 172 pdf
Download the Cessna 172 Checklist PDF for safe and efficient flights. Your essential guide for pre-flight, start, and landing procedures.
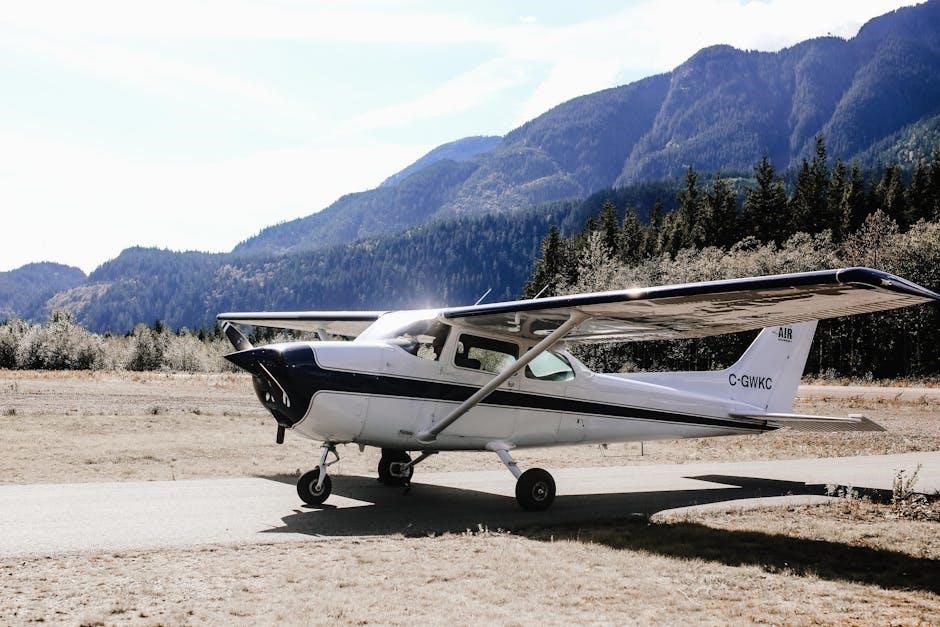
Preflight Inspection Checklist for Cessna 172
The preflight inspection for the Cessna 172 ensures safety by checking the propeller, control locks, fuel quantity, and aircraft documentation. Exterior and interior checks are performed meticulously.
1.1 Exterior Inspection
The exterior inspection is a critical component of the preflight checklist for the Cessna 172. Start by examining the propeller for nicks, cracks, or security issues. Inspect the nose wheel strut and tires for proper inflation and signs of wear. Check the landing gear alignment and ensure brakes are functional. Verify the control surfaces (ailerons, elevators, rudder) for proper movement and absence of damage. Look for obstructions in the pitot tube and ensure the static ports are clean. Inspect the wingtips and leading edges for dents or debris. Check the fuel caps for security and tightness to prevent fuel leaks. Finally, ensure all lights (navigation, landing, taxi) are clean and functional. This thorough inspection ensures the aircraft is airworthy and ready for safe operation.
1.2 Interior Inspection
The interior inspection of the Cessna 172 involves verifying the aircraft’s systems and safety features; Begin by checking the documents (ARROW: Airworthiness Certificate, Registration, Radio License, Operating Handbook, and Weight & Balance). Remove the control lock and ensure all seatbelts are functional. Verify the fuel selector is set to BOTH and the mixture is idle cutoff. Check the avionics and electrical systems, ensuring the master switch is OFF and circuit breakers are secure. Test the intercom and ensure all instruments, including the heading indicator, are functioning properly. Check the flaps and trim settings, and ensure the transponder code is set correctly. Finally, verify the communication radios are operational and all doors/windows are secure. This ensures a safe and ready cockpit environment for flight.

Engine Start and Run-Up Procedures
Ensure fuel quantity is adequate, mixture is idle cutoff, and throttle is closed. Start the engine, check oil pressure, and perform the magneto check at 1200 RPM.
2.1 Engine Start Checklist
Ensure the area around the aircraft is clear and the brakes are set. Check the fuel quantity and ensure the fuel selector is set to the correct tank. Turn the master switch to the “ON” position and verify all electrical systems are functioning. Set the ignition switch to the “START” position, engaging the starter. Allow the engine to idle and check for proper oil pressure. Once the engine is running smoothly, perform a quick instrument panel scan to ensure all readings are within normal ranges. Set the throttle to a low idle and complete the run-up checklist, including the magneto check at 1200 RPM. Ensure the propeller is functioning correctly and there are no unusual vibrations or sounds. After starting, secure the ignition switch and prepare for taxi or run-up procedures.
2.2 Run-Up and Mag Check
Advance the throttle to 1200 RPM and perform the magneto check. Observe the RPM drop for each magneto, ensuring it does not exceed 125 RPM for each and 50 RPM between magnetos. Check for smooth engine operation and proper fuel flow. Apply carburetor heat to verify proper function and monitor for any significant RPM decrease. Ensure all instrument readings remain within normal ranges. Listen for any unusual engine noises or vibrations. After completing the mag check, return the throttle to idle and allow the engine to stabilize. Verify the oil pressure and temperature are within acceptable limits. If any issues are detected, address them before continuing with the flight. This step ensures the engine is performing correctly and safely for takeoff.
Takeoff and Climb Procedures
Advance the throttle smoothly to full power. Ensure the aircraft is aligned with the runway centerline. Rotate at VR (60 KIAS) and establish a pitch attitude for VX (70 KIAS). Monitor instruments and maintain runway heading. Climbing at VX ensures the best angle of climb and obstacle clearance.
3.1 Normal Takeoff
For a normal takeoff in the Cessna 172, align the aircraft with the runway centerline and advance the throttle smoothly to full power. Perform a final check of the heading and ensure all controls are free and functioning. As speed increases, gently pull back on the yoke at the rotation speed (VR), which is approximately 60 KIAS. Once airborne, pitch for the best angle of climb (VX) at 70 KIAS to ensure maximum climb performance. Maintain runway heading and monitor airspeed. Flaps should be retracted after reaching a safe altitude. Continue climbing at VX until reaching the desired altitude, then reduce power to the recommended cruise setting. Always maintain situational awareness and adjust as needed for wind or other conditions.
3.2 Emergency Takeoff Procedures
In the event of an engine failure during takeoff in the Cessna 172, remain calm and follow established procedures. If the failure occurs before liftoff, stop the aircraft on the runway and engage the brakes. If airborne, secure the engine and pitch for best glide speed (approximately 65 KIAS). Assess the situation to determine the best course of action, such as returning to the field or landing straight ahead. Maintain control of the aircraft and avoid stalls by keeping airspeed above the stall speed (Vs). Retract flaps and landing gear if time permits to minimize drag. Prepare for landing by aligning with a suitable field and configuring the aircraft as needed. Communicate with ATC if possible and prioritize a safe outcome. Always follow the POH and emergency procedures for specific guidance.

Cruise and Descent Procedures
During cruise, maintain optimal altitude and airspeed (80-90 KIAS) for fuel efficiency. Begin descent at 90 KIAS, configuring flaps and mixture as needed for a stable approach.
4.1 Cruise Checklist
During cruise, set altitude and airspeed (80-90 KIAS) for optimal fuel efficiency. Monitor fuel quantity and adjust the mixture for best economy or power. Ensure navigation and communication systems are functioning correctly. Check heading and altitude periodically to stay on course. Adjust flaps and trim as needed for smooth flight. Monitor engine instruments, oil pressure, and temperature within normal ranges. Ensure all systems, including electrical and vacuum, are operating properly. Conduct regular checks on the autopilot (if equipped) to maintain stability. Verify transponder and altitude encoding are active. Maintain communication with ATC or UNICOM as required. Log fuel consumption and estimate remaining endurance. Prepare for descent by configuring the aircraft and briefing passengers. Ensure all loose items are secured and seatbelts are fastened. Review approach procedures for the destination airport before beginning descent.
4.2 Descent and Approach Preparation
Begin descent by reducing power and pitch to maintain 90 KIAS. Configure flaps incrementally (10° for initial descent, 20° for base leg, and 30°-40° for final approach). Ensure fuel selector is set to BOTH and mixture is RICH. Lower landing gear at appropriate altitude and verify three green lights. Switch to destination airport frequency and announce position. Turn on landing and taxi lights for visibility. Brief passengers on landing procedures and secure loose items. Set heading indicator to match runway direction. Review airport diagram for specific procedures. Adjust altimeter for local barometric pressure. Monitor airspeed (target 60 KIAS on final) and descent rate. Ensure carburetor heat is applied as needed. Stabilize approach by 500 feet AGL and prepare for landing. Review emergency procedures and be ready to go around if unstable.

Landing Procedures
Extend flaps to 40°, maintain 60 KIAS, and align with the runway centerline. Reduce power after touchdown and apply brakes gently to avoid propeller damage.
5.1 Normal Landing
Configure the aircraft for landing by extending flaps to 40° and reducing power to maintain 60 KIAS on final approach. Ensure the landing light is on and align the aircraft with the runway centerline. Gradually reduce power after touchdown and apply gentle brakes to maintain directional control. Avoid aggressive braking to prevent propeller damage. Secure the aircraft by setting the parking brake, turning off the ignition, and completing the post-landing checklist. Ensure all systems are properly shut down before exiting the aircraft.
5.2 Short-Field or Crosswind Landing

For short-field landings, configure flaps to 40° or FULL, depending on the situation, and maintain an approach speed of 55 KIAS. Aim for the first third of the runway to minimize rollout distance. Gently touch down with minimal float to ensure prompt deceleration. In crosswind conditions, use crab or wing-low techniques to align with the runway. After touchdown, apply gentle but firm brakes to maintain control and directional stability. For crosswind landings, ailerons should be held into the wind to counteract drift. Ensure the aircraft remains aligned with the centerline throughout the rollout. Secure the aircraft by setting the parking brake and following the post-landing checklist. Always prioritize precise control and situational awareness during these challenging landing scenarios.

Post-Flight Procedures
Secure the aircraft by setting the parking brake and completing the post-flight checklist. Ensure mixture is at idle cut-off, master switch is off, and control locks are on. Document flight and perform final inspection.
6.1 Securing the Aircraft
Post-flight, securing the Cessna 172 involves several critical steps to ensure safety and preservation of the aircraft. First, apply the parking brake and set the control locks to prevent unintended movement. Next, tie down the aircraft using approved tie-down points and ropes to secure it against wind or other external forces; Install pitot and static port covers to protect sensitive instruments from debris or pests. Ensure the propeller is secured with a lock or pin to prevent accidental rotation. Finally, disconnect the battery to avoid drain and verify all systems, including avionics and lights, are turned off. Complete a final walk-around inspection to confirm everything is in order before leaving the aircraft.